Getting Started
UPDATE: Serverless 1.0 was released earlier this year. There are a lot of improvements in v1.x. I suggest you go and read the docs for the most up to date information.
AWS Lambda and other compute services (Google Cloud Functions, Azure Functions, ect), are playing an increasingly more important role in Application Architecture. The potential cost savings and potential to eliminate infrastructure management are the two main reasons why developers should be utilising compute services.
When I first looked at AWS Lambda it was very unclear to me how to structure and deploy a Lambda based application. Fortunately for me, someone else has solved those problems while I was working on other things. The Serverless Framework provides a project structure and tools to deploy a Lambda based project.
To learn more about Serverless and AWS Lambda, I decided to compare it to a framework I am already familiar with, Express.
I started with a very basic Express app. I wanted to learn how to receive input through a web request and return JSON.
**var** express **=** require('express');
**var** foo = require('./foo');

**var** app **=** express();

app.get('/foo/:id', **function** (req, res) {
  **var** id **=** req.params.id;

  foo
    .get(id)
    .then(**function**(foo) {
      res.status(200).send(foo);
    })
    .**catch**(**function** (err) {
      res.status(500).send();
    });
});

app.listen(5000, **function** () {
  console.log('Listening on port 5000');
});
Before you get started with Serverless, you will need to sign up for an AWS Account, create IAM credentials and store those credentials as a profile on your machine.
Once you have done this, you need to install the Serverless command line tool using npm:
npm install serverless -g
After installing the tool we’re ready to create a project. The create command will ask you a number of questions and initialise your project.
I used the -c argument to stop Serverless from deploying the CloudFormation template to AWS. If you want to deploy the project to AWS later you’ll need to run the resources deploy command later.
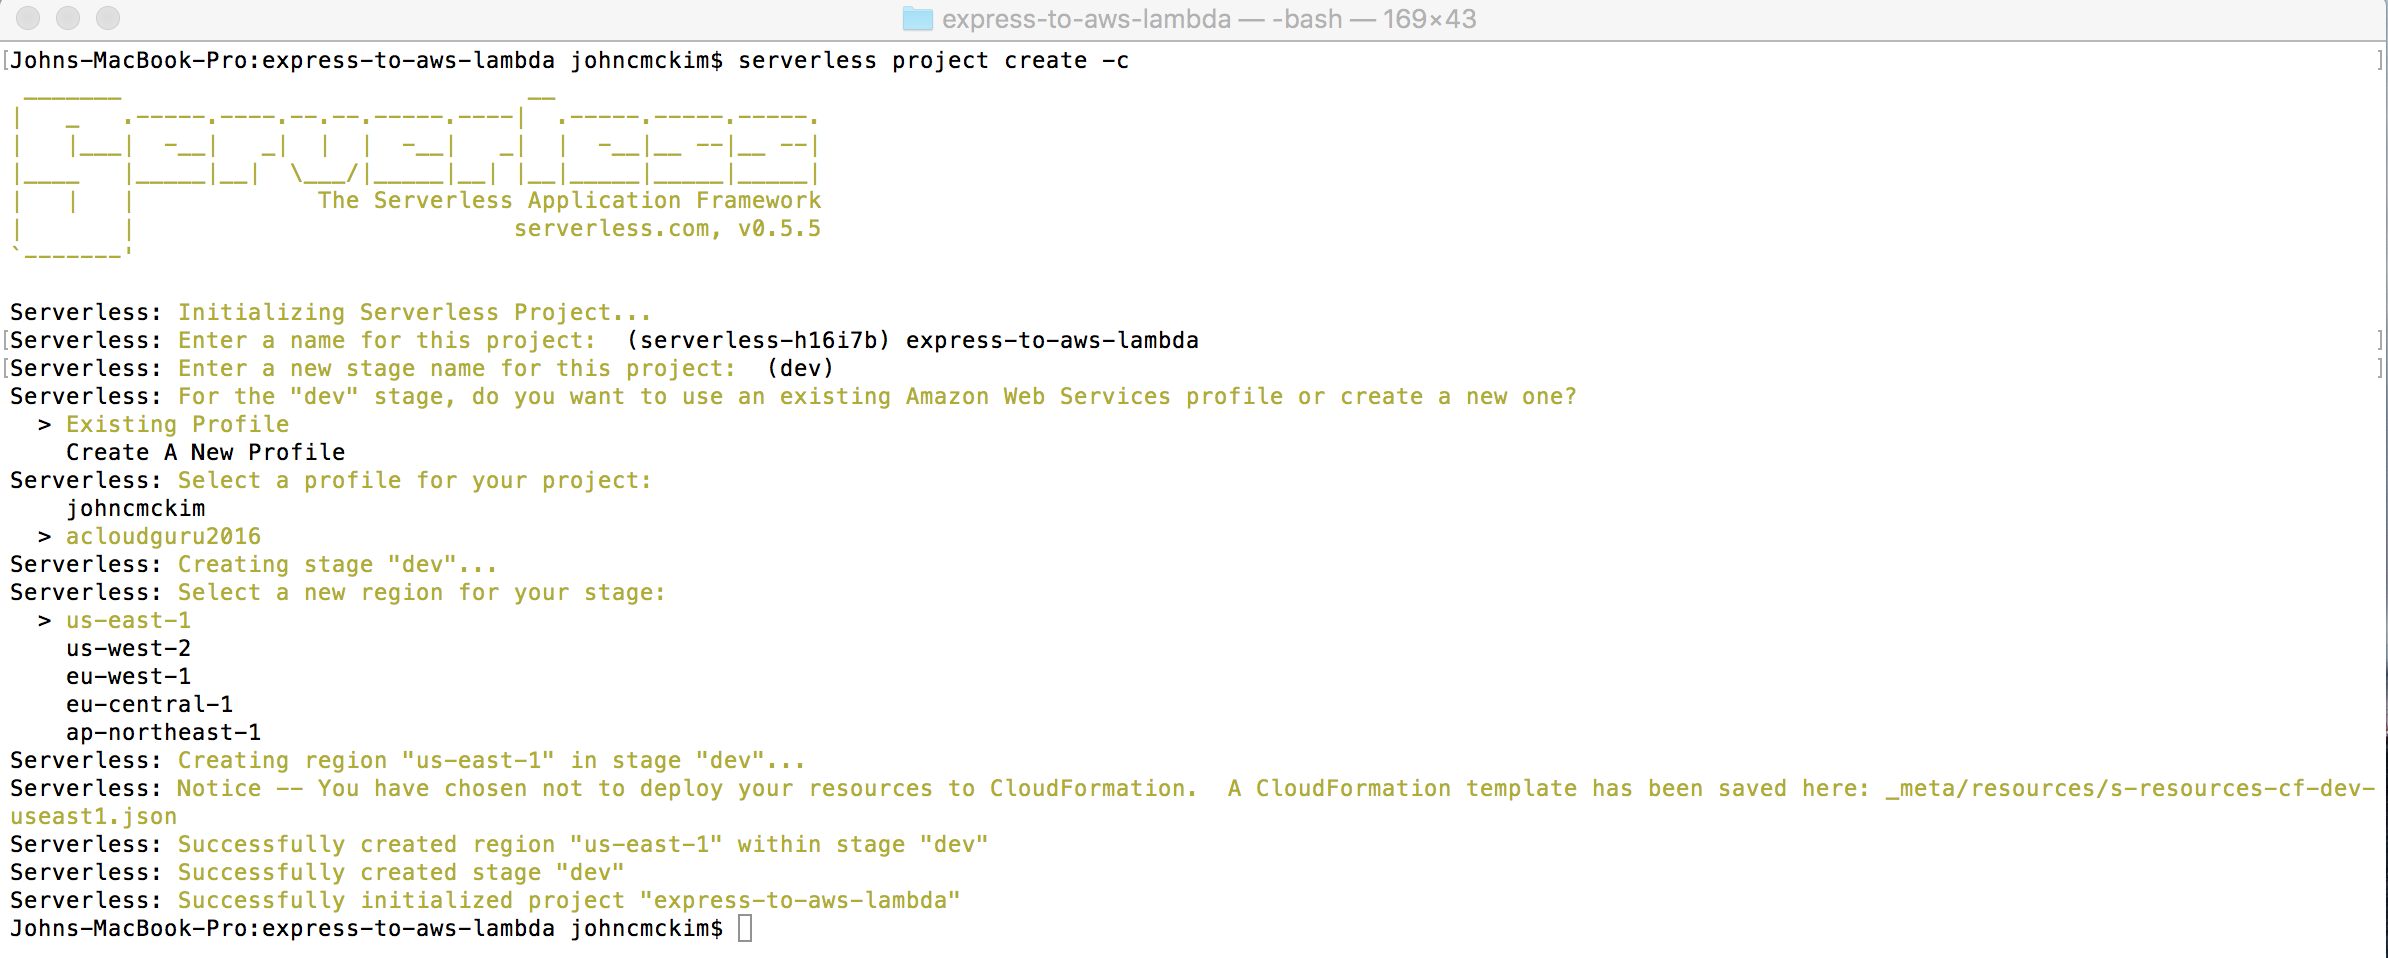 serverless project create -c
Once this is command has finished you will have a project with the following structure:
s-project.json
s-resources-cf.json
admin.env
_meta
  |__resources
     |__s-resources-cf-dev-useast1.json
  |__variables
     |__s-variables-common.json
     |__s-variables-dev.json
     |__s-variables-dev-useast1.json
At this stage our project just contains metadata about the project and a CloudFormation template.
The next step is to create a function. There are a few architectural choices you can make here, Monolithic, Microservices and Nanoservices. You can read more about this in the Serverless Documentation. Each option has benefits and you can mix all three styles into one Application. I have chosen to use Nanoservices for this example.
The create function will ask you to choose a runtime and if you want to create an AWS API Gateway Endpoint, Event or Just the Function. For our example, we need to create an endpoint.
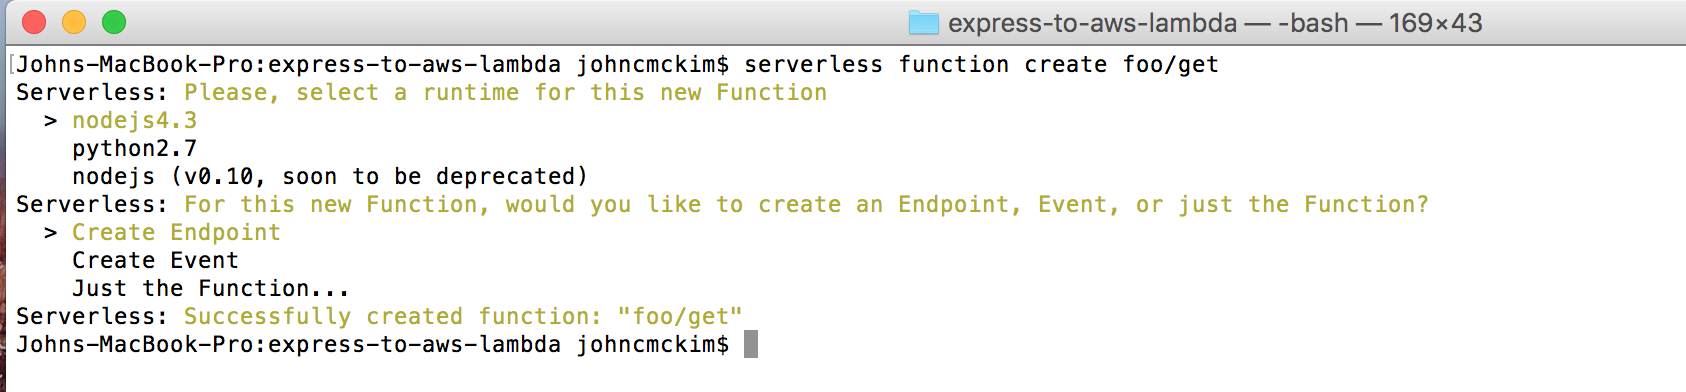 serverless function create
This will add the following files to your project.
foo
  |__get
     |__event.json
     |__handler.js
     |__s-function.json
This brings us to implementing our GET method. The code that is executed by Lambda when a request is made to our endpoint is contained in handler.js.
This file contains a function with three parameters:
event — contains event data (request params)
context — contains runtime information
callback — used to return information to the caller (response data)
This function is called when a request is made to our API Gateway endpoint. The implementation of our handler is very similar to the implementation of the get method in the Express app.
**var** foo = require('../lib/foo');

*//Lambda Handler*
module.exports.handler **=** **function**(event, context, cb) {

** var** id **=** event.id;

  foo
    .get(id)
    .then(**function**(foo) {
      cb(null, foo); //Successful response
    })
    .**catch**(**function** (err) {
      cb(err); //Error response
    });
};
There are two key differences:
The id parameter is retrieved from the event object instead of using req.params.
The response is returned through a callback.
The final step is to update the s-function.json. This file defines our API Gateway endpoint. We need to include the id parameter in the request path and include it in the event object.
"name": "get",
...
"endpoints": [{
  "path": "foo/{id}", // Include id param in path
  "method": "GET",
  ...
  "requestTemplates": {
    "application/json": {
      "id": "$input.params('id')" // Add id to the event object
    }
  }
  ...
}]
...
To test the function locally we need to simulate API Gateway. A plugin called Serverless Offline starts a web server that simulates API Gateway. Follow the instructions on Github to install the plugin.
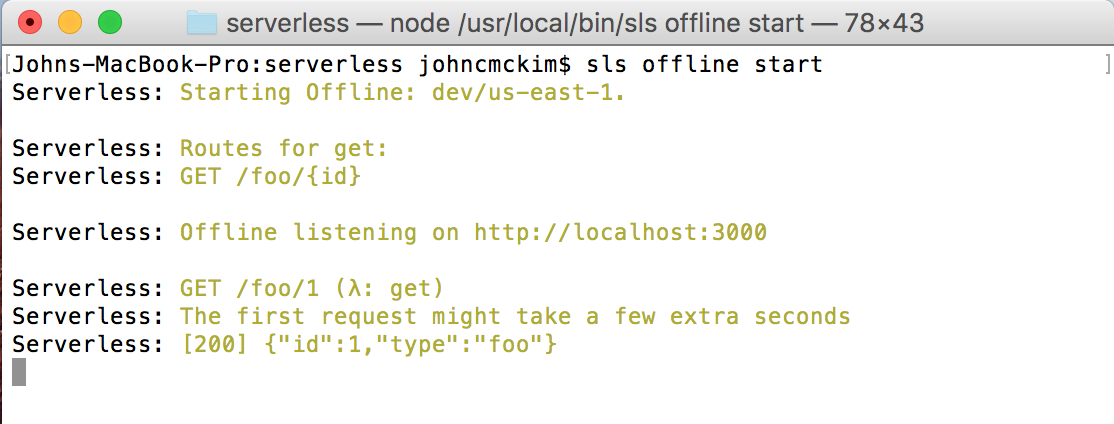 Serverless Offline console
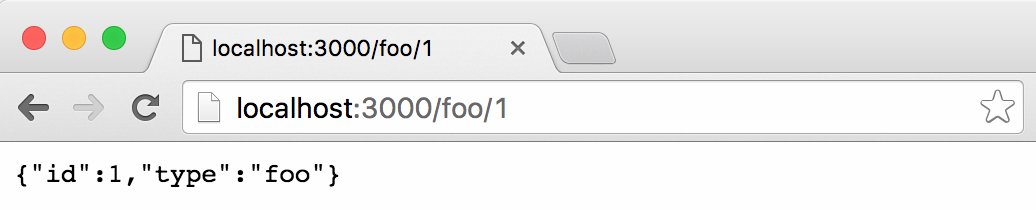 Response in the Browser
The point of this exercise was to convert an Express app to Serverless. While we’ve successfully done that for a basic Express app, we’re a long way from converting a real world app to Serverless.
We haven’t covered:
I will cover those issues in future posts. If you want to explore this example more in the mean time, please check out the repo on Github.